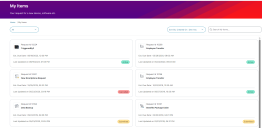
My Items
The My Items workspace allows you to track all requests and reported incidents that you have raised to date and keep a track of their status. A progress bar is displayed in the Incident page with the following options to show the current status of the incident:
•Logged
•In Progress
•Resolved
•Closed
You can add additional information for a request in the form of notes and attachments. You can add new notes and view existing notes. The notes are displayed in chronological order, with the most recent note appearing first. When you add a new note with description, the timestamp records the date and time of the note creation. The notes added and published with an Admin role are also displayed under Notes section. You can also submit a new service request or incident from this page.
The My Items workspace displays a list of all your items. You can filter this list to view the items based on your requirement. You can use the Search My Items field, Sort by: Created On : Des-Asc field and drop-down list to narrow down your search criteria.
To search using the Search My Items field:
1.Log in to Neurons for ITSM .
2.From the workspace menu, click My Items. A list of records appears.
3.To search for a specific item, enter a keyword in the Search My Items field and click the ![]() icon. The matching results appear.
icon. The matching results appear.
To search for items that are in Approval state, Issues, and Requests ,
1. Click Filter - Select the filter option: All, Approval, Issue, and Request. The page displays the items based on your search criteria.
To search for items based on Created date and Modified date (in ascending and Descending order and vice versa) , ID, and Status.
1.Click Sort By - Select the sort by option: Created On: Asc-Des, Created On: Des-Asc, Modified On: Asc-Des, Modified On:Des-Asc, ID, and Status. The page displays the items based on your search criteria.
You can update a service request that is progress by adding a note or an attachment (such as an image, document, and so on) to it.
To add notes:
1.From the workspace menu, click My Items. A list of records appear.
2.Click on a record you want to update.
3.Click Status, and then under Notes , enter your comments.
4.Click Add Note.
After an incident reaches to Closed state, you cannot add new notes.
To add an attachment:
You can upload files to your incident using the Attachments tab. Various file types such as images, documents, and common formats are supported. You can choose the file type based on your requirement.
1.From the workspace menu, click My Items. A list of records appears.
2.Click on a record you want to update.
3.ClickAttachment, and then under Add Attachments, click Browse and select a file to attach. You can also drag and drop the files you want to attach on the page.
To delete an attachment, click . A confirmation dialog box appears prompting you for a confirmation to avoid accidental deletions
You can update a service request that's in progress by adding a note or an attachment (such as an image, document, and so on) to it. Those additions become a permanent part of the request record that you can't delete.
1.From the workspace menu, click My Items.
2.From the list view, open the request you want to update.
3.Click Status.
•Enter your note and click Add Note.
•Click Attachment, and then under Add Attachments, click Browse and select a file to attach.
Next time you open this service request and click Status tab, you'll see a timestamp with your note and/or the attached file.
To help the Service Desk resolve an incident, you may need to add a note or attachment to it. You can only do so after logging the incident. Once you add a note or an attachment, it becomes a permanent part of the incident record that you can't delete.
1.From the workspace menu, click My Items.
2.Find the incident in the list view and open it.
•In the Attachments section, click Browse and select a file to attach.
•In the Status section, enter your note and click Add Note.

